WordPress Child Themes: When and How to Use Them – A Practical Guide
Introduction

If you run a WordPress site, you’ve probably heard the term child theme. Maybe someone told you that you absolutely must use one. That’s not always true. But in many situations, a child theme is one of the smarter technical decisions you can make. This WordPress child themes guide covers what child themes are, when they actually make sense, and how to set one up without overthinking it. It’s written for site owners who want to customize their site without breaking things when the next theme update rolls in. If you’ve ever edited a theme file directly and lost those changes after an update, this is for you.
What Exactly is a WordPress Child Theme?
A child theme is a separate theme that inherits all the functionality and styling of another theme, called the parent theme. Think of it as a layer on top. The parent theme remains untouched, and the child theme only contains the files where you want to make changes. When WordPress loads a page, it checks the child theme first. If a file or piece of code exists in the child theme, it uses that. If not, it falls back to the parent theme. This is handled through two key files: style.css and functions.php. The style.css file contains a header that declares the parent theme relationship. The functions.php file typically loads the parent styles and allows you to add or override functionality. This structure keeps your customizations separate from the parent theme, which is the entire point.
Why Use a Child Theme? The Real Benefits
The main reason to use a child theme is safe updates. If you customize a parent theme directly, every time that theme gets an update, your changes will be overwritten. With a child theme, the parent can update freely, and your customizations remain intact. You also get security patches and new features from the parent theme without losing work.
Child themes also speed up development. If you’re building a site on a well-coded parent theme like GeneratePress or Genesis, you get a solid foundation without starting from scratch. You only write the code you need. That saves hours or even days.
Another benefit is learning. If you’re learning WordPress theme development, a child theme lets you experiment safely. You can dig into template files and CSS without worrying about breaking a live site, because you can always switch back to the parent theme.
Here’s a quick look at the tradeoffs:
- Customizing parent theme directly: Changes are immediate, but gone after an update.
- Using a child theme: Takes a few minutes to set up, but changes are permanent and updates are safe.
- Using a custom theme: Maximum control, but requires significantly more development time and ongoing maintenance.
For most site owners, the child theme is the sweet spot. It’s low effort, high safety.
When You Should NOT Use a Child Theme
Child themes aren’t always the right answer. If you’re using a theme framework that already has built-in child theme functionality, like Genesis, you’re already working within that structure. In that case, you’re effectively using a child theme already.
If you’re building a site entirely from scratch with a custom theme, there’s no parent to inherit from. A child theme only makes sense when there’s an existing parent theme that you want to modify.
Another situation where a child theme adds unnecessary complexity is when you rely heavily on a page builder like Elementor or Beaver Builder. Many of those tools handle customizations through a custom CSS panel or theme builder interface. You can often achieve the same result without a child theme by using the built-in override options.
Similarly, if you only need to add a small amount of custom CSS, most theme customizers now include a custom CSS field. You don’t need a child theme for a few lines of styling. Reserve child themes for when you need to modify template files, add custom functions, or make structural changes.
How to Create a Child Theme (Step-by-Step)
Creating a child theme isn’t complicated. You can do it manually in a few minutes. Here’s the process.
Step 1: Create a Theme Folder
Navigate to /wp-content/themes/ on your server via FTP or your hosting file manager. Create a new folder. Name it something descriptive like yourtheme-child.
Step 2: Create style.css
Inside that folder, create a file called style.css. Add the following header at the top:
/*
Theme Name: Your Theme Child
Template: yourtheme
*/
Replace “Your Theme Child” with whatever you want to call it. The Template line must match the folder name of the parent theme exactly. This is critical. If the parent theme folder is called generatepress, then Template: generatepress. A reliable code editor with PHP and CSS syntax highlighting can help you catch typos before they become problems.
Step 3: Create functions.php
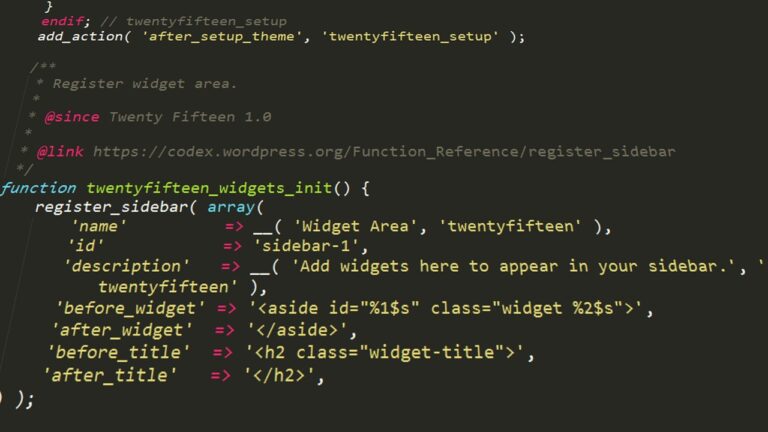
Create a file called functions.php in the same folder. Add this code to enqueue the parent styles:
<?php
function my_child_theme_enqueue_styles() {
    wp_enqueue_style( 'parent-style', get_template_directory_uri() . '/style.css' );
}
add_action( 'wp_enqueue_scripts', 'my_child_theme_enqueue_styles' );
?>
This ensures the parent theme styles load first. You can then add your own custom CSS to the child theme’s style.css file.
Step 4: Activate the Child Theme
Go to your WordPress admin, navigate to Appearance > Themes. You should see your child theme listed. Activate it. Your site should look exactly the same as before, because the child theme is inheriting all the parent theme files.
If you see a broken layout, double-check the Template header in your style.css. That’s the most common mistake.
Essential Files and Structure of a Child Theme

The minimum requirements for a child theme are exactly two files: style.css and functions.php. That’s all you need to get started.
After that, you can optionally add other files. The most common ones include:
- Template files like
header.php,footer.php,single.php,page.php. Place a copy of the parent file in your child theme and edit it there. screenshot.png– a 1200×900 image that appears in the WordPress admin theme selector. Not required but good for clarity.- Additional CSS files or JavaScript files, but you’ll typically handle those through
functions.php.
The directory structure looks like this:
/wp-content/themes/yourtheme-child/
├── style.css
├── functions.php
├── screenshot.png (optional)
├── header.php (optional override)
└── page.php (optional override)
When a page loads, WordPress looks in the child theme folder first. If it finds a file there, it uses it. If not, it falls back to the parent. This is the template hierarchy in action and it’s what makes child themes so powerful.
Common Mistakes When Working with Child Themes
Even experienced developers make errors with child themes. Here are the most frequent ones.
Incorrect Template header. If the Template line in style.css doesn’t match the parent theme folder name exactly, the child theme won’t work. Check for typos and case sensitivity.
Forgetting to enqueue parent styles. If you don’t load the parent theme CSS in functions.php, your site will lose all the parent styling. Always include the enqueue function.
Editing parent theme files anyway. Some people create a child theme but still edit the parent theme directly out of habit. That defeats the purpose. Put all customizations in the child theme files.
Using incorrect file paths. When overriding template files, use the exact same file name and location as the parent theme. If the parent theme has template-parts/content.php, you need to recreate that folder structure inside your child theme.
Saving customizations in the parent theme database options. Some themes store settings in the database. Those aren’t part of the file structure and can still be overwritten by an update. Check if your theme uses a customizer or theme options panel.
If something breaks, first check these four things. It usually solves the problem.
How to Customize Your Child Theme Safely
Once your child theme is active, you can start customizing. The safest approach is to make changes incrementally and test each one.
Overriding template files. Copy the file you want to change from the parent theme into your child theme, keeping the same file path. Then edit the copy. This works for any template file: header.php, footer.php, single.php, archive.php, and so on. One thing to be careful about: if the parent theme updates and changes the structure of that template file, your override will still be used. That means you might miss a new feature or a security fix. Review the parent theme changelog before each update.
Adding custom CSS. Write your CSS in the child theme’s style.css file. This is the simplest way to change colors, fonts, spacing, and layout. Keep your CSS organized with clear comments so you know what each block does.
Adding custom functions. Use the child theme’s functions.php to add new functionality. You can add custom post types, widgets, shortcodes, or modify existing WordPress behavior. Always wrap your code in a function and hook it properly. For testing code changes safely, a staging plugin for WordPress is worth considering before deploying to a live site.
Modifying page layouts. Some themes use page builder templates or custom layout settings. If you need to change the layout for a specific page, create a custom page template in your child theme. Copy an existing page template from the parent theme, give it a new name, and edit the structure.
Before deploying changes to a live site, test everything on a staging environment. For simple CSS changes, you can often test using browser developer tools and then copy the working code into your child theme.
Child Themes vs. Custom Themes: Which Should You Choose?
This decision depends on your project scope and your skill level. Let’s compare the two.
Child themes are best when you already have a parent theme that meets 70-90% of your needs. You get a solid foundation, regular updates, and community support. You only write the code you need to customize. This is ideal for most business sites, blogs, and ecommerce stores. Development time is measured in hours, not days.
Custom themes are built entirely from scratch. You have complete control over every aspect of the site, but you also have to build everything from the ground up. That includes features like menus, widgets, post types, and responsive design. It also means you’re responsible for ongoing maintenance, security updates, and compatibility testing. A custom theme can take weeks or months to develop properly.
Here’s a simple way to decide:
- Choose a child theme if you want to customize a premium theme quickly and safely.
- Choose a custom theme if you have a unique design requirement or if the parent theme is holding back a specific feature.
- Choose a child theme if you’re not a developer and want to avoid long-term maintenance.
- Choose a custom theme only if you have the budget and expertise to maintain it.
For the vast majority of projects, a child theme is the practical choice.
What Happens If Your Parent Theme Gets Updated?

When the parent theme receives an update, the child theme is generally not affected. That’s the whole point. Security patches, performance improvements, and new features from the parent theme will apply to your site automatically, because the child theme inherits the parent theme files.
The only risk is when a parent theme update changes the structure of a template file that you have overridden in your child theme. For example, if the parent theme updates header.php to add a new accessibility feature, but your child theme still uses the old header.php, you won’t get that improvement. To avoid this, always review the parent theme update changelog. If it mentions template changes, check whether any of your overrides are affected. The best practice is to maintain a staging site, apply updates there first, and test everything before updating production.
In almost all cases, child themes are safer than editing the parent theme directly. That safety margin is worth the few minutes it takes to set one up.
Recommended Tools for Managing Child Themes
Having the right tools makes working with child themes much smoother. Here are the ones I use and recommend.
Local WP – A local development environment that lets you run WordPress on your computer. It’s free and essential for testing changes before pushing them to a live site. You can set up a local copy of your site, install your child theme, and test updates safely.
Visual Studio Code – A code editor that’s free and works on any platform. It has syntax highlighting for PHP, CSS, and HTML, which helps catch errors before they break your site. You can also install extensions for FTP integration and Git version control.
FileZilla – An FTP client for transferring files to and from your server. If you prefer not to use the hosting file manager, FileZilla is reliable and free.
Premium Parent Themes – Some parent themes are built specifically to work well with child themes. Two I recommend:
- GeneratePress – Lightweight, fast, and has excellent documentation on child theme setup.
- Genesis Framework – A robust framework with a large library of child themes. It’s well maintained and has a strong developer community.
These tools aren’t required, but they save time and reduce frustration. If you’re just starting out, a local development environment is the most important investment. An external hard drive for site backups is a practical addition for anyone managing multiple WordPress sites, especially when testing child theme changes.
How to Troubleshoot a Broken Child Theme
If your site looks wrong or throws errors after activating a child theme, don’t panic. Here’s a checklist to follow.
- Check file permissions. Ensure your child theme folder and files are readable. Permissions should be 755 for folders and 644 for files.
- Verify style.css header. Open
style.cssand confirm theTemplateline matches the parent theme folder name exactly. Spaces matter. - Check functions.php. Make sure the enqueue function is correct. A single typo can break the entire stylesheet. Use a PHP linter or paste your code into a text editor to catch syntax errors.
- Temporarily disable plugins. Sometimes a plugin conflicts with the child theme setup. Disable all plugins and see if the issue resolves. If it does, re-enable them one by one to find the culprit.
- Switch to the parent theme. If everything works with the parent theme, the problem is in your child theme. Recheck your files.
- Check error logs. Look at your server error logs or enable WordPress debugging. Add this to your
wp-config.phpfile:define('WP_DEBUG', true);. Check for PHP errors that point to a specific file and line.
Most child theme issues come down to a mismatched template name or a missing enqueue function. Fixing those two things resolves 90% of problems.
Final Thoughts and Best Practices
Child themes aren’t always necessary, but they are a best practice for long-term maintainability. If you plan to customize a parent theme in any significant way, take the ten minutes to create a child theme. It’ll save you the frustration of losing work and the headache of troubleshooting broken sites after updates.
Start with a simple child theme on your current project. Make a small change, like a color override or a footer edit. See how it works. Once you’re comfortable, you can start overriding template files and adding custom functions. The pattern is the same every time. By using child themes consistently, you build a habit that keeps your sites stable, your customizations safe, and your updates headache-free. Keep an eye on parent theme updates. As long as you stay on top of changelogs, you’ll have a site that both evolves and stays under your control.